Lightmap Parameters
Switch to ScriptingA Lightmap Parameters Asset stores a set of values for the parameters which control Unity’s Global Illumination (GI) features. These Assets allow you to define and save different sets of values for lighting, for use in different situations.
To create a new Lightmap Parameters Asset, right-click in the Project window and go to Create > New Parameters Asset. Unity stores this in your Project folder.
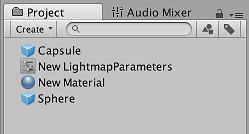
Lightmap Parameters Assets allow you to quickly create presets optimized for different types of GameObjectsThe fundamental object in Unity scenes, which can represent characters, props, scenery, cameras, waypoints, and more. A GameObject’s functionality is defined by the Components attached to it. More info
See in Glossary, or for different platforms and different Scene types (for example, indoor or outdoor Scenes).
When you click on a LightmapA pre-rendered texture that contains the effects of light sources on static objects in the scene. Lightmaps are overlaid on top of scene geometry to create the effect of lighting. More info
See in Glossary Parameters Asset in the Project window, the InspectorA Unity window that displays information about the currently selected GameObject, Asset or Project Settings, alowing you to inspect and edit the values. More info
See in Glossary window displays the values defined in that Asset. The parameters and their descriptions are listed in the table below.
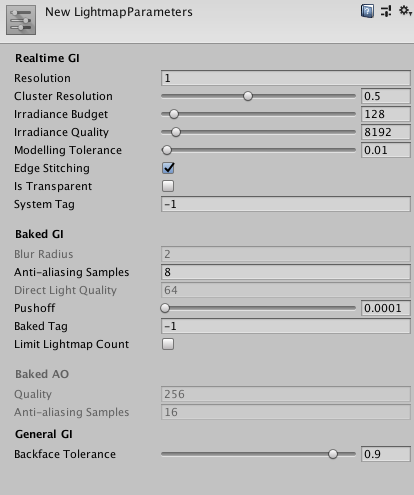
Realtime GI
| PropertyA generic term for the editable fields, buttons, checkboxes, or menus that comprise a component. An editable property is also referred to as a field. More info See in Glossary |
Function |
|---|---|
| Resolution | This value scales the Realtime Resolution value in the Scene tab of the Lighting Window (menu: Window > RenderingThe process of drawing graphics to the screen (or to a render texture). By default, the main camera in Unity renders its view to the screen. More info See in Glossary > Lighting Settings > SceneA Scene contains the environments and menus of your game. Think of each unique Scene file as a unique level. In each Scene, you place your environments, obstacles, and decorations, essentially designing and building your game in pieces. More info See in Glossary) to give the final resolution of the lightmap in texels per unit of distance. |
| Cluster Resolution | The ratio of the cluster resolution (the resolution at which the light bounces are calculated internally) to the final lightmap resolution. See documentation on GI Visualizations in the Scene view for more information. |
| Irradiance Budget | This value determines the precision of the incoming light data used to light each texel in the lightmap. Each texel’s lighting is obtained by sampling a “view” of the Scene from the texel’s position. Lower values of irradiance budget result in a more blurred sample. Higher values increase the sharpness of the sample. A higher irradiance budget improves the lighting, but this increases run-time memory usage and might increase CPU usage. |
| Irradiance Quality | Use the slider to define the number of rays that are cast and used to compute which clusters affect a given output lightmap texel. Higher values offer visual improvements in the lightmap, but increase precomputing time in the Unity Editor. The value does not affect runtime performance. |
| Modelling Tolerance | This value controls the minimum size of gaps in MeshThe main graphics primitive of Unity. Meshes make up a large part of your 3D worlds. Unity supports triangulated or Quadrangulated polygon meshes. Nurbs, Nurms, Subdiv surfaces must be converted to polygons. More info See in Glossary geometry that allows light to pass through. Make this value lower to allow light to pass through smaller gaps in your environment. |
| Edge Stitching | If enabled, this property indicates that UV charts in the lightmap should be joined together seamlessly, to avoid unwanted visual artifacts. |
| Is Transparent | If enabled, the object appears transparent during the Global Illumination calculations. Back-faces do not contribute to these calculations, and light travels through the surface. This is useful for invisible emissive surfaces. |
| System Tag | A group of objects whose lightmap Textures are combined in the same lightmap atlas is known as a “system”. The Unity Editor automatically defines additional systems and their accompanying atlases if all the objects can’t be fitted into a single atlas. However, it is sometimes useful to define separate systems yourself (for example, to ensure that objects inside different rooms are grouped into one system per room). Change the System Tag number to force new system and lightmap creation. The exact numeric sequence values of the tag are not significant. |
Baked GI
| Property | Function | |
|---|---|---|
| EnlightenThe lighting system by Geomerics used in Unity for computing global illumination (GI). More info See in Glossary |
Progressive Lightmapper | |
| Blur Radius | The radius of the blur filter that is applied to direct lighting during post-processingA process that improves product visuals by applying filters and effects before the image appears on screen. You can use post-processing effects to simulate physical camera and film properties, for example Bloom and Depth of Field. More info post processing, postprocessing, postprocess See in Glossary in texels. The radius is essentially the distance over which neighboring texels are averaged out. A larger radius gives a more blurred effect. Higher levels of blur tend to reduce visual artifacts but also soften the edges of shadows. |
Blur Radius is not available when you use Progressive LightmapperA tool in Unity that bakes lightmaps according to the arrangement of lights and geometry in your scene. More info See in Glossary. |
| Anti-aliasing Samples | The degree of anti-aliasing (the reduction of “blocky” artifacts) that is applied. Higher numbers increase quality and bake time. | The number of times to supersample a texel to reduce aliasing. Samples [1;3] disables supersampling, samples [4;8] give 2x supersampling, and samples [9;256] give 4x supersampling. This mostly affects the amount of memory used for the positions and normals buffers (2x uses four times the amount of memory, 4x uses 16 times the amount of memory). |
| Direct Light Quality | The number of rays used to evaluate direct lighting. A higher number of rays tends to produce more accurate soft shadows but increases bake time. | Direct Light Quality is not available when you use Progressive Lightmapper. |
| Backface Tolerance | The structure of a Mesh sometimes causes some texels to have a “view” that includes back-facing geometry. Incoming light from a backface is meaningless in any Scene. Because of this, this property lets you select a percentage threshold of light that must come from front-facing geometry in order for a texel to be considered valid. Invalid texels have their lighting approximated from their neighbors’ values. Lowering this value can solve lighting problems caused by incoming light from backfaces. | The percentage of rays shot from an output texel that must hit front faces to be considered usable. Allows a texel to be invalidated if too many of the rays cast from it hit backfaces (the texel is inside some geometry). In that case artefacts are avoided by cloning valid values from surrounding texels. For example, if backface tolerance is 0.0, the texel is rejected only if it sees nothing but backfaces. If it is 1.0, the ray origin is rejected if it has even one ray that hits a backface. In the Baked Texel Validity scene viewAn interactive view into the world you are creating. You use the Scene View to select and position scenery, characters, cameras, lights, and all other types of Game Object. More info See in Glossary mode one case see valid (green) and invalid (red) texels. If you have a single sided mesh in your scene, you may want to disable this feature by setting it to zero. A two-sided flag will later be added in the editor to address this. |
| Pushoff | The distance to push away from the surface geometry before starting to trace rays in modelling units. It is applied to all baked lightmaps, so it affects direct light, indirect light, and AO. Pushoff is useful for getting rid of unwanted AO or shadowing. Use this setting to solve problems where the surface of an object is shadowing itself, causing speckled shadow patterns to appear on the surface with no apparent source. You can also use this setting to remove unwanted artifacts on huge objects, where floating point precision isn’t high enough to accurately ray-trace fine detail. | The amount to push off ray origins away from geometry along the normal for ray tracingThe process of generating an image by tracing out rays from the Camera through each pixel and recording the color contribution at the hit point. This is an alternative to rasterization. raytracing See in Glossary, in modelling units. It is applied to all baked lightmaps, so it affects direct light, indirect light and ambient occlusionA method to approximate how much ambient lighting (lighting not coming from a specific direction) can hit a point on a surface. See in Glossary. It is useful for getting rid of unwanted occlusion/shadowing. |
| Baked Tag | Similar to the System Tag property above, this number lets you group specific sets of objects together in separate baked lightmaps. As with the System Tag, the exact numeric value is not significant. Objects with different Baked Tag values are never put in the same atlas; however, there is no guarantee that objects with the same tag end up in the same atlas, because those objects might not necessarily fit into one lightmap (see image A, below, for an example of this). You don’t have to set this when using the multi-scene bake API, because grouping is done automatically (use the Baked Tag to replicate some of the behavior of the Lock Atlas option). See Baked Tags: Details, below, for more information. | |
| Limit Lightmap Count | Limit Lightmap Count is not available when you use Enlighten. |
Limit Lightmap Count applies a maximum number of lightmaps that Unity can use when packing GameObjects with the same Baked GI settings. When you enable Limit Lightmap Count, a setting appears underneath it called Max Lightmaps; use this to set the maximum number of lightmaps Unity can use. Unity considers GameObjects to have the same Baked GI settings if they have equal values for Anti-aliasing Samples, Pushoff, Baked Tag, and Backface Tolerance. This means that Unity might pack together GameObjects associated with different lightmap parameter Assets. To pack the GameObjects, Unity gradually scales down the UV layouts until all GameObjects fit inside the specified number of lightmaps. The Lightmapper Settings define the size of these lightmaps. This process might reduce the GameObjects’ lightmap resolution. |
Baked Tags: Details
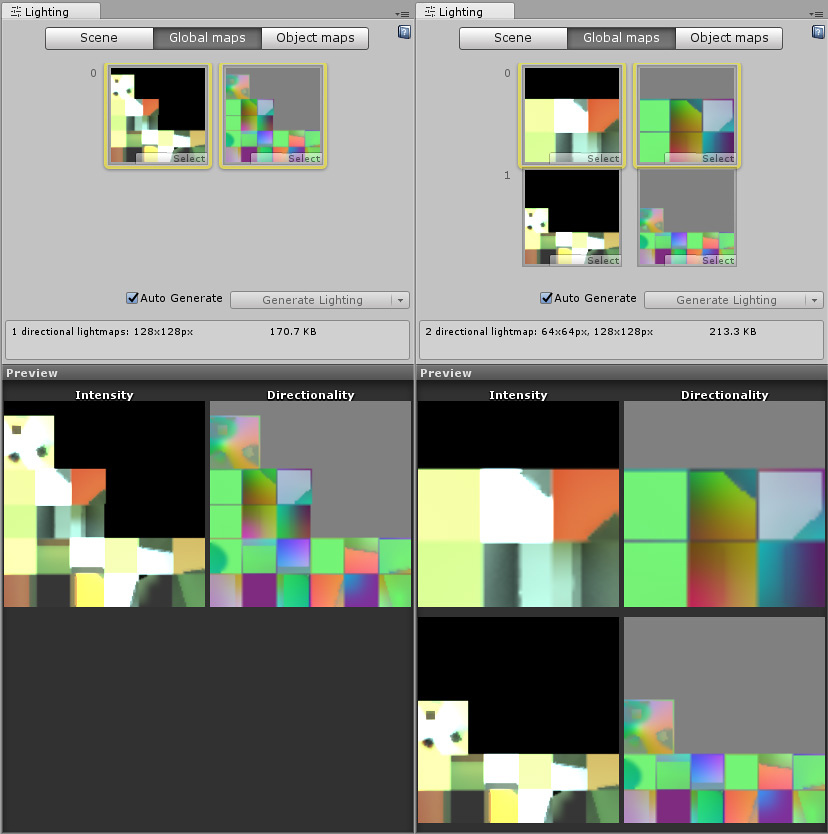
The image above shows two views of the same Scene:
Left: Everything is in one atlas because all the GameObjects have the same Baked Tag.
Right: One GameObject is assigned a different Baked Tag, and forced into a second lightmap.
Baked AO
| Property | Function |
|---|---|
| Quality | The number of rays cast when evaluating ambient occlusion (AO). A higher numbers of rays increases AO quality but also increases bake time. |
| Anti-aliasing Samples | The number of samples to take when doing anti-aliasing of AO. A higher number of samples increases the AO quality but also increases the bake time. |
General GI
| Property | Function |
|---|---|
| Backface Tolerance | The percentage of rays shot from an output texel that must hit front faces for the lighting system to consider them usable. This allows Unity to invalidate a texel if too many of the rays cast from it hit back faces ( (for example, if the texel is inside some geometry). The lighting system clones valid values from the surrounding texels to avoid unintended artifacts. If Backface Tolerance is 0.0, the lighting system rejects the texel only if it sees nothing but backfaces. If it is 1.0, the lighting system rejects the ray origin if it has even one ray that hits a backface. |
Assigning Lightmap Parameters Assets
Scenes
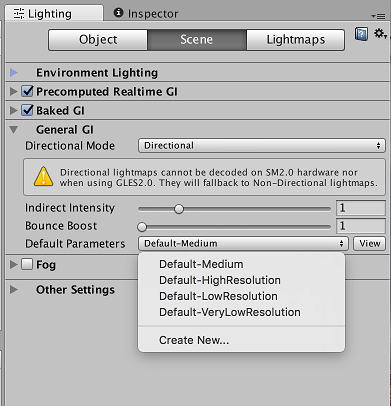
To assign a Lightmap Parameters Asset to the whole Scene, open the Lighting window (Window > rendering > Lighting Settings), click the Scene tab, and navigate to the General GI settings.
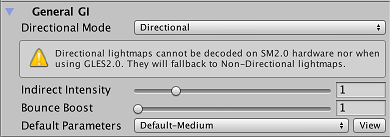
Use the Default Parameters drop-down to assign a default Lightmap Parameters Asset. This drop-down lists all available Lightmap Parameters Assets.
GameObjects
To assign a Lightmap Parameters Asset to a single GameObject, ensure the GameObject has a Mesh RendererA mesh component that takes the geometry from the Mesh Filter and renders it at the position defined by the object’s Transform component. More info
See in Glossary or TerrainThe landscape in your scene. A Terrain GameObject adds a large flat plane to your scene and you can use the Terrain’s Inspector window to create a detailed landscape. More info
See in Glossary component attached.
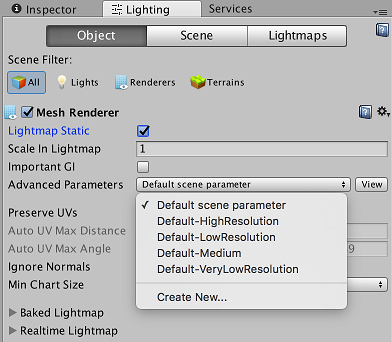
To assign a Lightmap Parameters Asset to a Mesh Renderer, tick the component’s Lightmap Static checkbox and select an option from Lightmap Parameters under Lightmap Settings. Choose Scene Default Parameter to use the same Lightmap Parameters Asset that is assigned to the whole Scene.
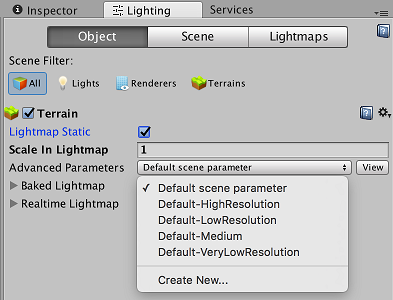
To assign a Lightmap Parameters Asset to a Terrain, tick the Terrain’s Lightmap Static checkbox and select an option from Advanced Parameters. Choose Scene Default Parameters to use the same Lightmap Parameters Asset that is assigned to the whole Scene.
2019–03–28 Page amended
2018–03–28 Page amended
Limit Lightmap Count added in 2019.1 NewIn20191
Progressive Lightmapper added in 2018.1 NewIn20181
Did you find this page useful? Please give it a rating: